|
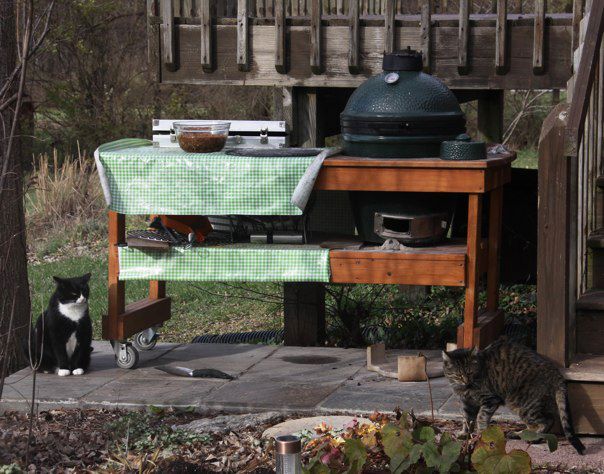
| Photo by Alice Kahn |
First of all, my apologies to Jon Feinstein for the play on the title of his wonderful book about Bob Knight and IU basketball. Having said that, what follows will is some of the highs (and not so highs) of my first year as a Big Green Egg aficionado. The bottom line is that it’s been wonderful - it’s made our culinary life much better, so much so that we’re seriously contemplating buying a second one this spring.
Buying the Egg
One tip here - decide how many people you are going to be cooking for and then buy one that is one size larger than what is recommended. Since I am usually only cooking for two of us, we decided to get a Medium. To be blunt, we should have gotten a Large. While the medium is fine for doing one chicken or roast, or for baking potatoes or cooking corn on the cob, doing more than one of these at a time is a challenge. Of course, it will never be possible to smoke a brisket and bake potatoes simultaneously, but a larger egg would make some combinations (like corn and potatoes, a favorite of ours) more practical.
Regarding accessories, if you can afford it, get the table - it is well worth it. A plate setter and an ashtool are also musts; beyond those I haven’t found any reason to spring for more than a decent set of barbecue tools, mitts, and a garden trowel for messing with charcoal. And if you are going to bake either pizza or bread, I highly recommend getting a Fibrament baking stone - it can withstand the heat (which super market pizza stones cannot), and it does a superb job. Pricey but worth it.
Firing it up
OK, this is what took me the longest time to figure out. But I’ve settled on the following ritual:
- Make sure the air holes that surround the chamber (there are five on my Medium Egg) are clear. If you are reusing charcoal from a previous adventure, they may have become plugged with ash, in which case you will have bad problems.
- I use two fire starters - wood chip and paraffin composites found in any super market barbecue section - and lump charcoal, also from the super market (the Big Green Egg charcoal costs twice as much and I can’t tell the difference).
- Open the lower vent all the way, ignite the starters, and let them burn for at least 15 minutes with the lid open (longer if you want to get it to pizza temperatures).
Close the lid, and with the bottom and top vents still wide open, let the temperature rise to the desired level. At that point, put the control vent on the top and stop down the bottom one. You will need to play, but I have found the following works for me:
- Low temperature for smoking. When the temperature reaches 250 degrees, add your wood chips and your food. When the temperature gets back up to 200 or so, stop the lower vent down to about 1/8 of an inch; place the black temperature control device on the top, and close all but the small holes controlled by the rotating diaphragm. Keep an eye on it and adjust as necessary to keep the temperature under 250 degrees. This is far and away the best temperature for cooking roasts and whole poultry.
- Intermediate temperature for baking. Do the same as you did for low temperatures, only let the temperature rise to your baking temperature (I use 450 degrees a lot) before stopping down the vents. Close the lower one to between 1/4 and 1/2 inch; close the swinging vent on the top so that the largest gap is about 3/4 inch. Again, you will need to monitor the temperature and fine tune these adjustments as you cook.
- Going nuclear for pizza. This is the trickiest. First of all, starting with fresh coals is generally a good idea. Get the bowl completely cleaned out and fill it liberally. Second, leave the lid open for at least 30 minutes after you ignite the starters - the coals should really be raging. Place the place setter in, legs down, put the pizza stone on top, close things up, and leaving the vents open, go put your pizza together. By the time you get back, the temperature should be above 550 degrees. I like to bake them between 550 and 600 - if it is much above that, stop down the vents somewhat and the temperature should go down. However, since pizza cooks quickly (typically no more than 10 minutes total), you will be opening the Egg more frequently than normal and thus losing heat. Bottom line - get the coals red hot and then watch the temperature very closely.
The Food
Of course this is what really matters. I typically work from recipes, some of which were written with barbecuing in mind and others of which weren’t. The Big Green Egg Cookbook is worth having - it has lots of good recipes, and if nothing else, it provides good Egg-specific directions for different cooking tasks. The other one I have found invaluable is Peter Reinhart’s book on baking artisan breads. In particular, his pizza dough and sourdough bread recipes have worked phenomenally well.
Below are some of the things I’ve had success with, and a few things I would change in the future.
Baked Potatoes.
I don’t know why these taste so good when cooked on the egg, but they do and they are easy. My wife prepares the potatoes - wraps them in foil along with a head of garlic and maybe a few jalapeno peppers (we’ve recently started using potato nails; they seem to help but are not necessary). Stick them in the Egg at 450 degrees, and let them go (for large ones) 90 minutes, flipping every 30 minutes or so. Unwrap them and eat.
Roast whole chicken.
- Use a “roaster” - I like ones that weigh at least 6 pounds. Smaller birds tend to dry out, and since the leftovers are very versatile, having too much to eat at one sitting is never a problem
- I strongly recommend the recipe for beer brined chicken in the BGE Cookbook as a starting point. The brining does seem to keep the bird much more moist. I do it a full day in advance
- I use a vertical roaster designed for “beer butt chicken”. It has a chamber to which you can add some beer (and perhaps some spices) and the bird then goes on a support that fits over the chamber. When I want lemon flavor, I cut a whole lemon in half and stuff it inside the bird prior to setting it on the support.
- If you want to smoke the bird (which I recommend), use apple chips. Cherry is also ok, but I find hickory to be overpowering. Soak 4–5 handfuls of chips in water for at least an hour before using them, drain the water, and then dump on the coals.
- About an hour prior to cooking, apply any rub you wish to the chicken and set it on the stand. I’ve had great success with this one from Cafe Tecumseh I use a commercial stand that has a chamber for liquid; I fill the chamber with beer; when I place the chicken in the egg, I add the rest of the beer to the roasting stand to provide moisture (unless I was bad and drank it instead)
- Let the chicken roast for 3–4 hours at 220 degrees, or until a meat thermometer inserted into the thigh registers at least 165 degrees. You may want to add some water to the tray periodically; if there is still some liquid left after baking, it makes for a delicious topping for the chicken.
Roast Pork
I’ve had good success with 3–4 pound loin roasts. Cooking times at smoking temperatures (to a final temperature of 180°) run 3–4 hours; pecan chips are my favorite. I particularly like a
garlic and rosemary rub. I use the standard smoking arrangement - place setter legs up, with an aluminum drip pan.
Pulled Pork
This is one that I love, but until recently have not been able to get satisfactory results. However, thanks to blogs too numerous to mention, the following worked extremely well
- Start with a 6–7 pound Boston Butt Roast. You will get a lot of meat from it, so either invite friends or prepare to freeze some (which works well). About 5 hours prior to beginning to roast it, cover it with your favorite dry rub.
- This is going to need at least 20 hours in the Egg, all at low temperature (about 220°), so plan on starting it the night before. Prepare the Egg and get it to temperature.
- Add about four handfuls of soaked oak chips and set the place setter in place, legs up. Place a disposable aluminum pan onto the place setter and add a couple of cups of water. Put the cast iron rack in place and set the roast on it, fat side up.
- Once the temperature is stabilized, let it go overnight.
- The next morning, add more charcoal and oak chips; restart the fire if necessary, and get the temperature back to 220°. Put more water in the drip pan
- Return the roast to the Egg, and let it cook until the internal temperature is over 200ࠠ. That will likely take all day.
- When it is done, take the roast out and let it stand for an hour wrapped in foil. Meanwhile, prepare your favorite sauce (I used a vinegar and catsup recipe from The Barbecue! Bible by Steven Raichlen).
- Unwrap the roast and pull it apart, either with a couple of forks or your fingers. It should do so readily. 9. Mix the meat with the sauce, heap it on a good quality bun, and enjoy.
Roast Beef
If you like roast beef rare or medium rare, this is actually something that can be prepared by smoking fairly quickly. I have achieved best results with sirloin tip roasts (2–3 pounds), but other quality cuts work as well.
- Although beef would probably work fine with minimal or no advanced preparation, I have used two marinades, both from Epicurious. This one imparts a very strong soy flavor to the meat, which actually tastes best after the cooked meat has been refrigerated and reheated. This is a milder choice, also excellent.
- Soak four handfuls of cherry wood chips in water for at least an hour.
- Prepare the Egg for smoking. When the temperature stabilizes at 220°, add the wood chips, the place setter legs up, and a disposable aluminum drip pan.
- Place the roast on the rack and pour the remaining marinade over it so that it gets caught in the drip pan.
- Cook the meat for about 2 hours, until the internal temperature reaches 120. This will actually be medium rare, since the meat continues to cook a little bit after you take it out.
Beef Brisket
I’m still working on this, but in brief, here’s what I’ve learned.
- A six pound brisket will fit in the Medium egg, although it may have to be folded a bit initially.
- Oak chips are the way to go for smoking.
- I use a commercial rub on the meat - I’m sure there are other alternatives.
- I use the place setter, legs up, and a drip pan with some water added to keep the atmosphere moist.
- I smoke the meat open on the rack for 3 hours, after which I wrap it in foil for at least three hours more.
The meat has been quite tasty when it is fresh off the grill; it does seem to dry out on refrigeration. Thus, I would recommend either inviting the world over to share in it or using leftovers in stews or casseroles.
Lamb Kebabs
This is one I came up with when we decided at the last minute to eat at home rather than go out for dinner, and I needed something I could put together quickly.
- I simply threaded lamb chunks, onion quarters and pieces of green pepper onto skewers and coated with a wonderful mix from Raichlen’s Barbecue! Bible, however this one from Epicurous sounds like a good possibility.
- Prepare the Egg for direct cooking at 450°
- Cook the kebabs for a total of 8–10 minutes, rotating frequently.
Corn on the Cob.
- At least an hour prior to cooking, pull the husks back (do not remove them) and soak the exposed kernels in water.
- Brush the ears with melted butter and season as desired. Tie the husks in place with butcher twine so that they cover the kernels.
- Place in the Egg at 450°. Roast for a total of 8–10 minutes, turning 2–3 times.
Bread
Cooking bread on the egg is not difficult; be forewarned, however, that the resulting loaves will have a heavy (but tasty) crust. It’s really not that difficult; here’s the procedure that’s worked for me.
- Use your favorite yeast bread recipe. I like the basic sourdough one from Reinart’s Artisan Breads Every Day; I use the “purist” method (sourdough starter only, no added yeast) and prepare two round loaves from one dough recipe.
- Heat the egg to 450 degrees and put the place setter in place, legs down.
- Place the Fibrament baking stone on the place setter and sprinkle with cornmeal.
- Place the loaf on the stone and bake for about 45 minutes, rotating it every 15 minutes or so. The internal temperature should reach about 195°.
- Cool on a rack for at least 30 minutes before slicing.
Pizza
OK, now for the best part. It’s taken some practice, but here’s the approach that has worked best for me.
- I use homemade pizza dough, made from the sourdough pizza dough recipe in Peter Reinart’s Artisan Breads Every Day. The recipe makes five small (8–10 inch) pizzas, which are excellent for cooking on the medium Egg.
- Heat is the key. Fill the egg generously. light with three starter sticks, and let it burn open for at least 30 minutes. The goal is to sustain a temperature of 600°, so lots of charcoal is a necessity.
- Once the fire is raging, carefully position the place setter with legs down; place the Fibrament pizza stone on top of it. Close the egg, and let the stone come to temperature for 20–30 minutes.
- Meanwhile, spread the dough and prepare the pizza as desired. I usually do so on a pizza peel covered with parchment paper.
- Slide the pizza (on the parchment paper, if using it) onto the stone, close the egg, and let it back 4 minutes.
- Carefully remove the parchment, and let the pizza bake for 4–7 more minutes, until it has reached the desired doneness. Note that if you are cooking multiple pizzas, and assuming the Egg holds a temperature of 550–600°, the pizzas cooked later will typically cook faster, as the stone will continue to increase in temperature throughout the process.
Conclusion
As is evident by now, I have become a huge fan of the Big Green Egg. I’m not at the point of traveling around the country to go to “Egg-stravaganzas” (not my style, and I still have to work for a living), but we are getting an Egg to use while on vacation in New York, and we’ve talked semiseriously about getting a second one here. No, we haven’t turned our kitchen into a storage room yet - even this winter, which was exceptionally mild, had some days where outside cooking was not practical. But it really has been amazingly fun, and we still have lots of culinary frontiers to explore.